Busch and Muller Toplight Line Brake Plus with standlight problem
My bike commute is around 8000 miles a year so I greatly value decent dynamo lights like those from Busch and Muller, especially this model which also works as a brake light. There's a lovely review of this at http://mccraw.co.uk/toplight-line-plus-review/.
Recently the standlight stopped working the instant the front wheel stopped turning. Normally the standlight continues to illuminate the lamp for about 10 minutes after I stop pedalling, so something was clearly wrong. Cue Richmond Makerlabs especially Jon and Paul.
Removing the Busch and Muller light

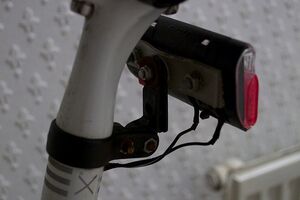
It was not immediately obvious how to remove the wires from the lamp but you see in the picture, at the base of the light is a black lever. This actually holds the wires in with a kind of resistance fit. So move the lever across and the wires come loose (I had quite forgotten this and had visions of re-routing the wiring from the front dynamo which made me wince). With the wires off, unbolting the light was quite obvious.
Opening up a Busch and Muller Topline rear light
Busch and Muller Service folks told me the light cannot be repaired and I should use the warranty. Well the lamp was out of warranty so I guess they really meant I should throw it away.
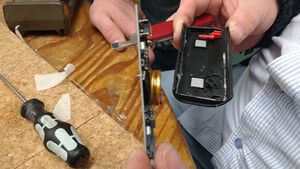
So this left us with cracking it open. There are 2 obvious clear tabs that protrude through the back of the lamp as you can see in the picture above. We started by pushing down both tabs with screwdrivers to try to separate the light face from the back. It was not as easy as it appeared. We gently edged in a screwdriver between the face and the back and along with pushing on those tabs, we gradually cracked the glue that holds the face to the back. Breaking 2 plastic components in this way comes with a real risk of damage but in this case we managed it without damage (but you may not be so lucky).
Identifying the problem - the capacitor
It took Jon and Paul substantially less than 1 minute to identify the problem once the lamp was in opened up. We first thought that the capacitor looked a lot like a lithium battery but soon enough we saw it for what it was. A capacitor. But very obviously, it was no longer connected to the circuit board beneath it. This being the obvious cause of the problem.

Before I knew it, the desk soldering iron was on. Jon and Paul de-soldered the connector that connects the capacitor to the circuit board. They then soldered the connector back onto the capacitor and then again back onto the circuit board.
Re-assembly
We quickly put it all back together in the obvious was to meet obvious success with the repair! I choose to tape the front and back of the lamp back together (in case of further tinkering being needed) but the tape was not sufficiently resilient. I'd recommend re-gluing the front and back (though a decent bit of duct tape still works for me at present!).